Rocky Linux 9 - 설치 II
페이지 정보

본문
안녕하세요.
꿈꾸는 여행자입니다.
RockyLinux 9 Version 설치 관련 자료를 공유 합니다.
이번 시간 진행 목차는 다음과 같습니다.
> 다음
I. 이번 수행 내역
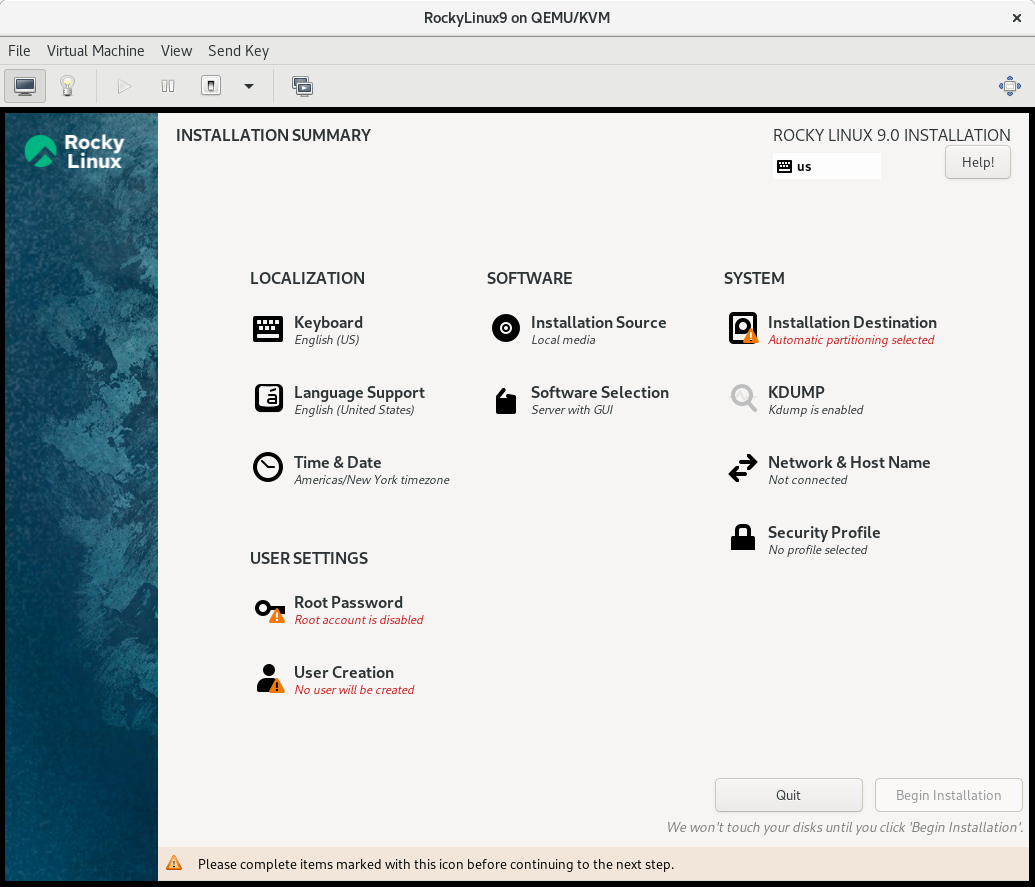
1.4. Installation Summary
1.4.1. Localization Section
1.4.1.1. Keyboard
1.4.1.2. Language Support
1.4.1.3. Time & Date
1.4.2. Software Section
1.4.2.1. Installation Source
1.4.2.2. Software Selection
1.4.3. System Section
1.4.3.1. Installation Destination
1.4.4. Network & Host Name
1.4.5. User Settings Section
1.4.5.1. Root Password
1.4.5.2. User Creation
1.4.6. Installer Phase
1.4.6.1. Start the Installation
1.4.6.2. Complete the Installation
1.4.6.3. Log In
1.4. Installation Summary
-
The screen is roughly divided into the following sections:
-
LOCALIZATION: (Keyboard, Language Support, and Time & Date)
-
SOFTWARE: (Installation Source and Software Selection)
-
SYSTEM: (Installation Destination, KDUMP, Network & Hostname and Security Profile)
-
USER SETTINGS: (Root Password and User Creation)
-
-
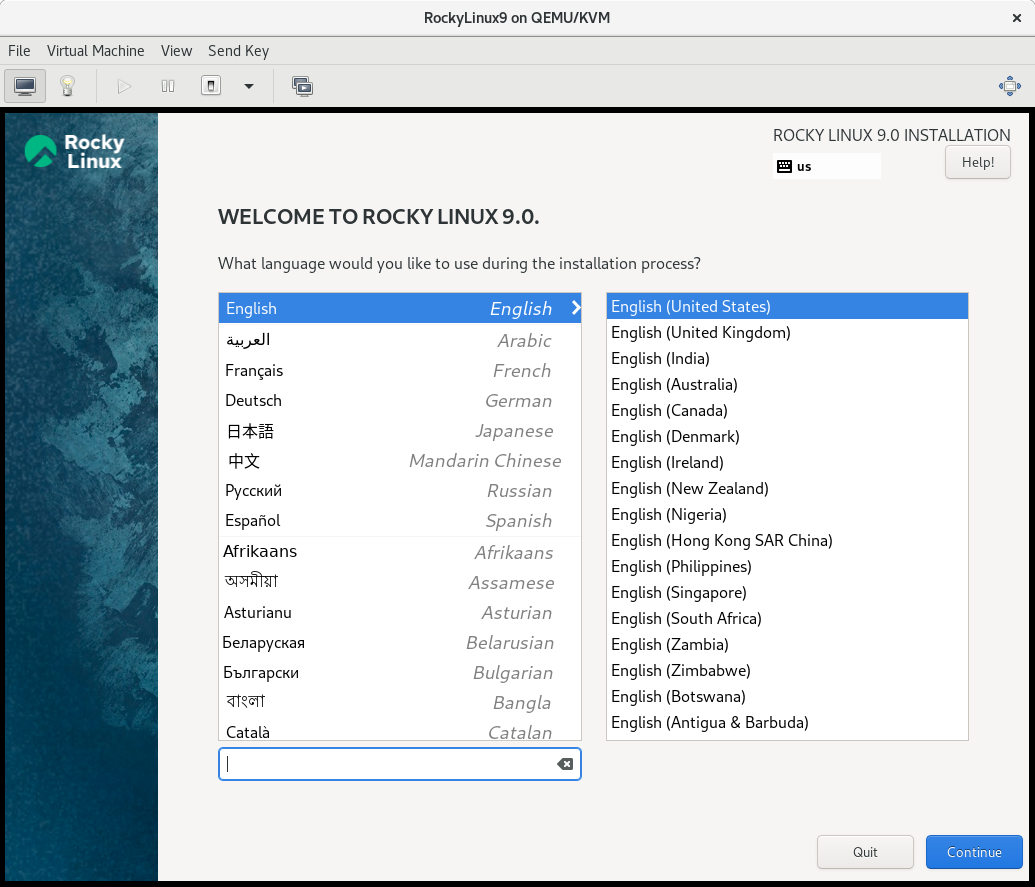
Select the language you want to use to perform the installation in this screen. For this guide, we select English (United States). Then click the Continue button.
1.4.1. Localization Section
1.4.1.1. Keyboard
-
On our demo system in this guide, we accept the default value (English US) and make no changes.
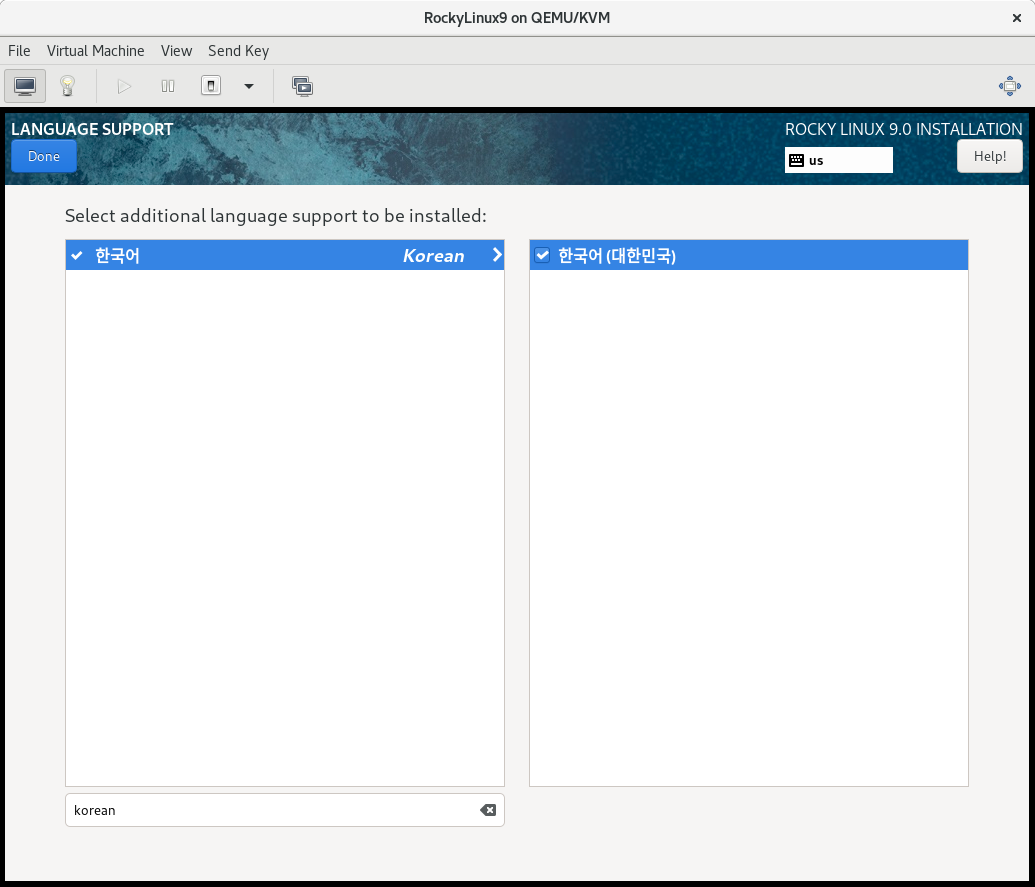
1.4.1.2. Language Support
-
The Language Support option on the Installation Summary screen enables you to specify support for additional languages that you may need.
-
We will accept the value
-
한국어 Korean
-
한국어 (대한민국) and make change, click Done
-
1.4.1.3. Time & Date
-
Click the Time & Date option on the main Installation Summary screen to bring up another screen that will allow you to select the time zone in which the machine is located. Scroll through the list of regions and cities and select the area closest to you.
-
Region: Asia
-
City: Seoul
-

1.4.2. Software Section
1.4.2.1. Installation Source
-
Since we are performing our installation using a Rocky Linux 9 ISO image, you will notice that Local Media is automatically specified under the Installation Source section of the main Installation Summary screen. We'll accept the preset defaults.
-
Local media
-
1.4.2.2. Software Selection
-
Clicking the Software Selection option on the main Installation Summary screen presents you with the section of the installation where you can pick the exact software packages that get installed on the system. The software selection area is divided into :
-
Server with GUI
-
1.4.3. System Section
1.4.3.1. Installation Destination
-
From the Installation Summary screen, click the Installation Destination option. This takes you to the corresponding task area.
-
Then click Done at the top of the screen.

1.4.4. Network & Host Name
-
The final task of the installation procedure deals with network configuration, where you can configure or tweak network-related settings for the system.
-
PASS
-
1.4.5. User Settings Section
-
This section can be used for creating a password for the root user account and also for creating new administrative or non-administrative accounts.
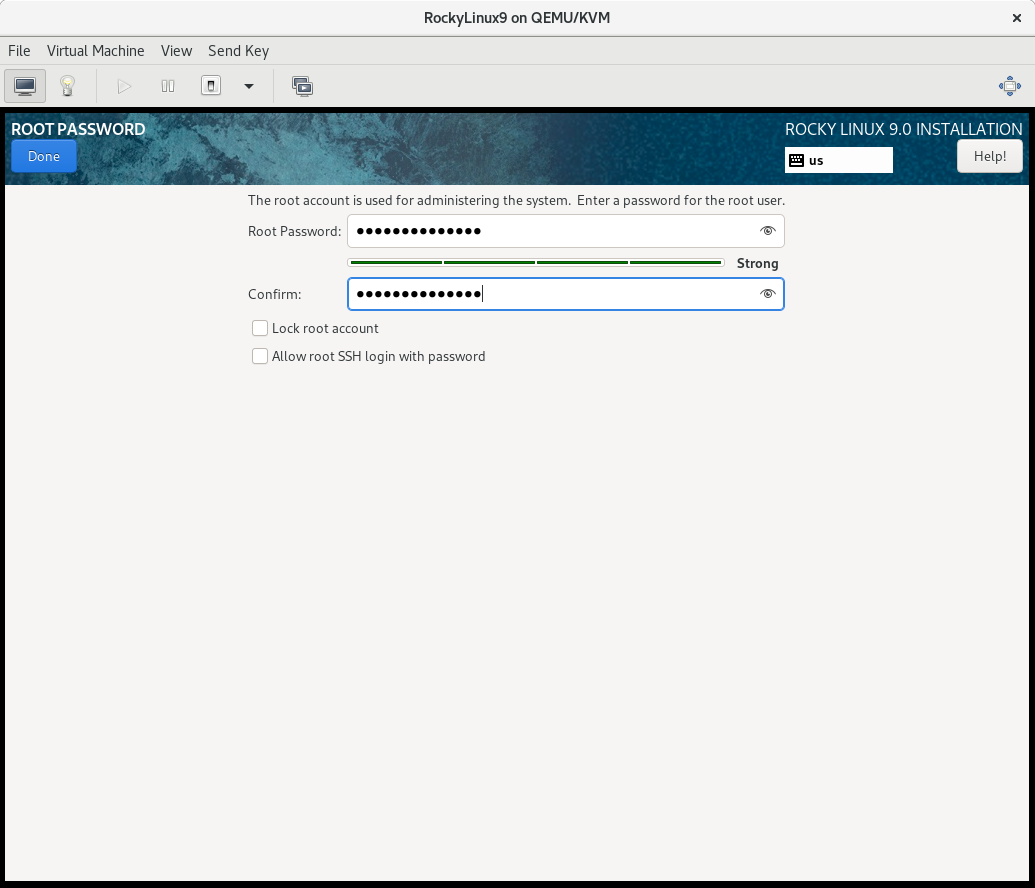
1.4.5.1. Root Password
-
Click the Root Password field under User Settings to launch the Root Password task screen.
1.4.5.2. User Creation
-
Next click the User Creation field under User Settings to launch the Create User task screen. This task area allows you to create a privileged or non-privileged (non-administrative) user account on the system.
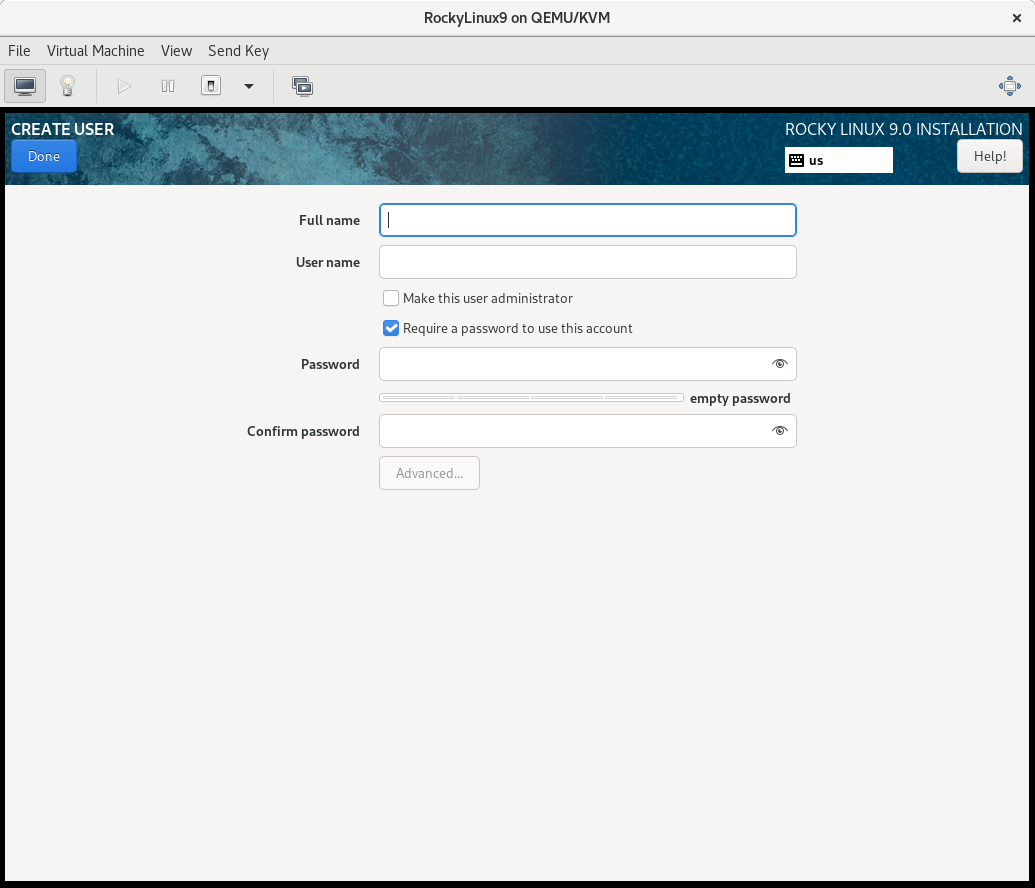
-
Complete the fields in the Create User screen with the following information and then click Done:
-
Full name: lds
-
Username: lds
-
Make this user administrator: Unchecked
-
Require a password to use this account: Checked
-
Password: [INPUT]
-
Confirm password: [INPUT]
-
-
Click Done.
1.4.6. Installer Phase
1.4.6.1. Start the Installation
-
Once you are satisfied with your choices for the various installation tasks, click the Begin Installation button on the main Installation Summary screen.


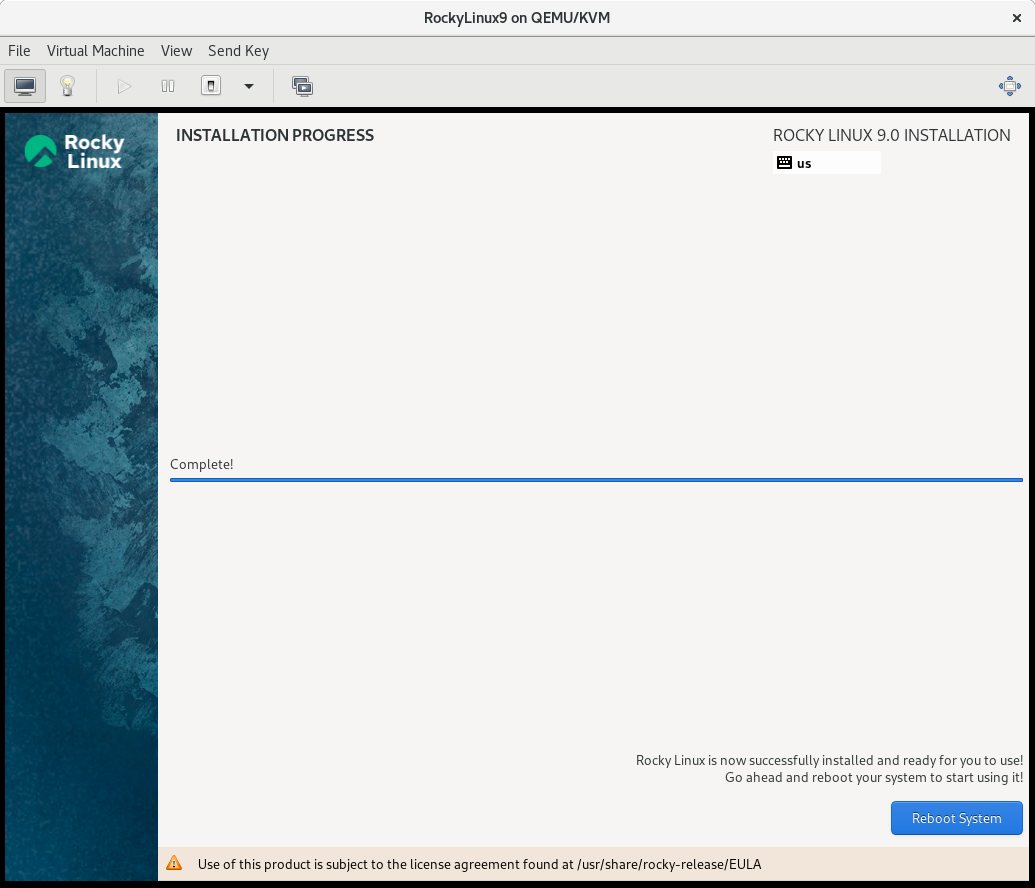
1.4.6.2. Complete the Installation
-
After the installer has run its course, you will be presented with a final installation progress screen with a complete message.
-
Finally, complete the entire procedure by clicking the Reboot System button. The system will restart.
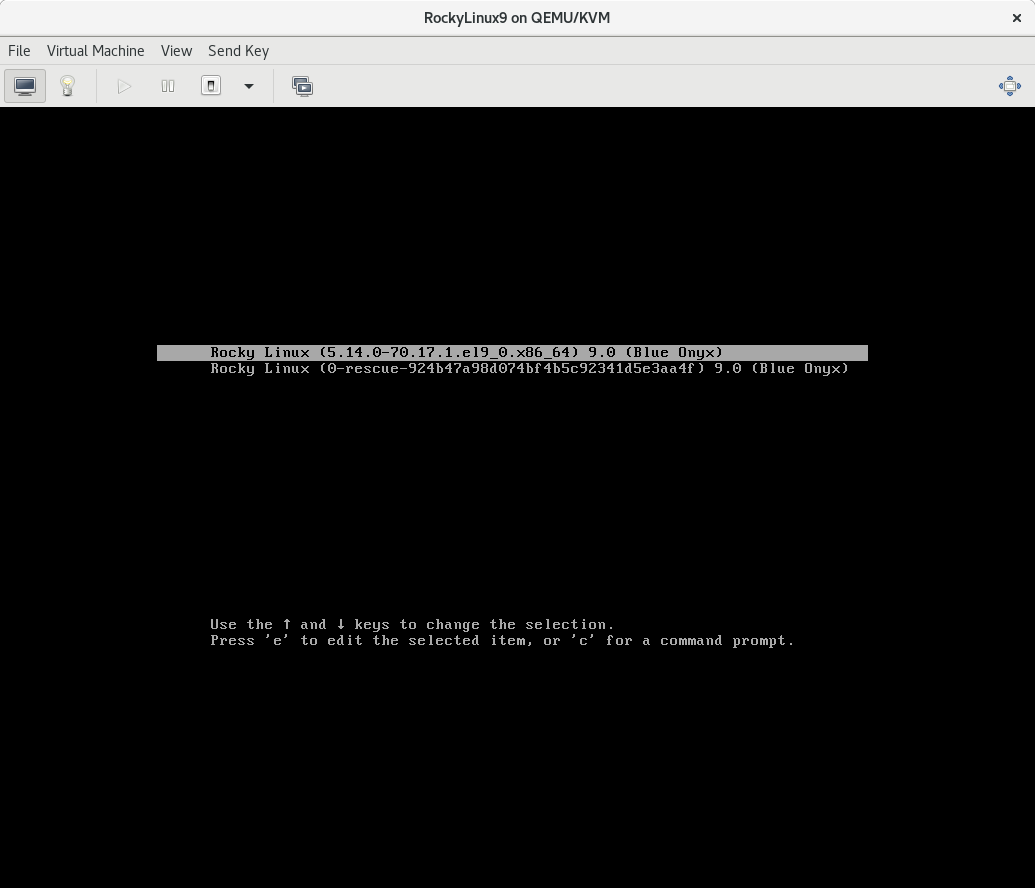
1.4.6.3. Log In
-
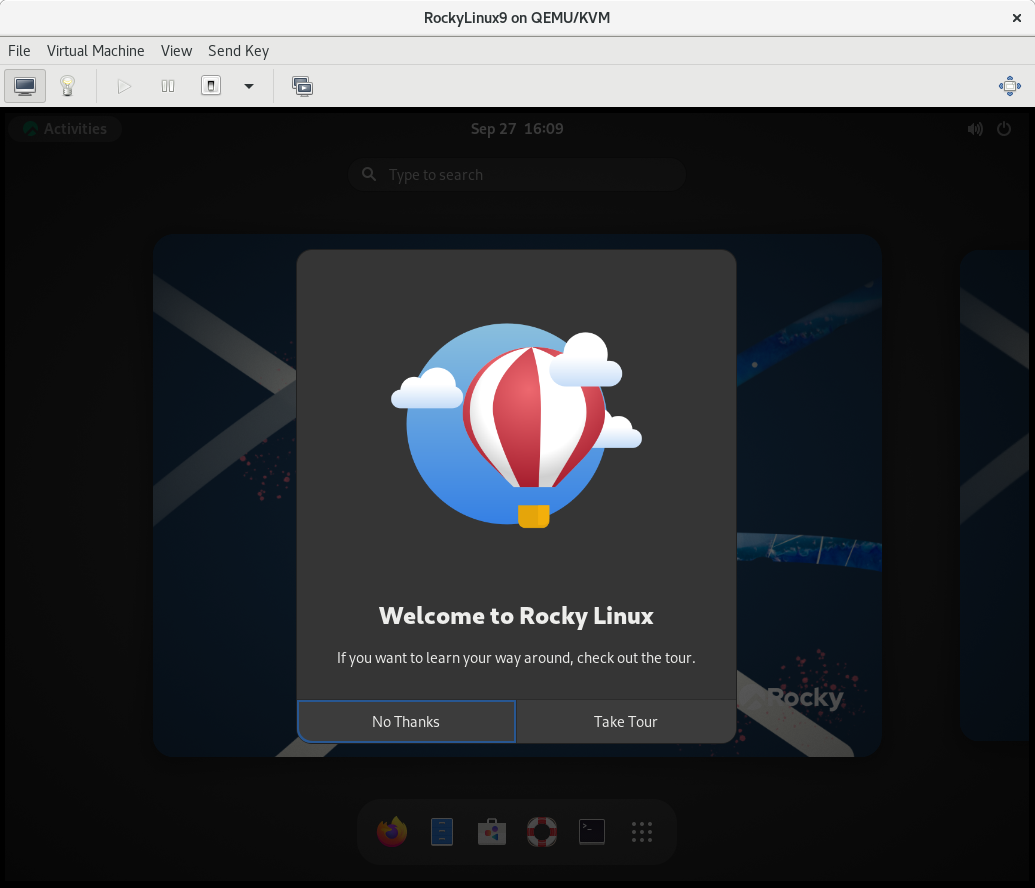
The system is now set up and ready for use. You will see the Rocky Linux console.
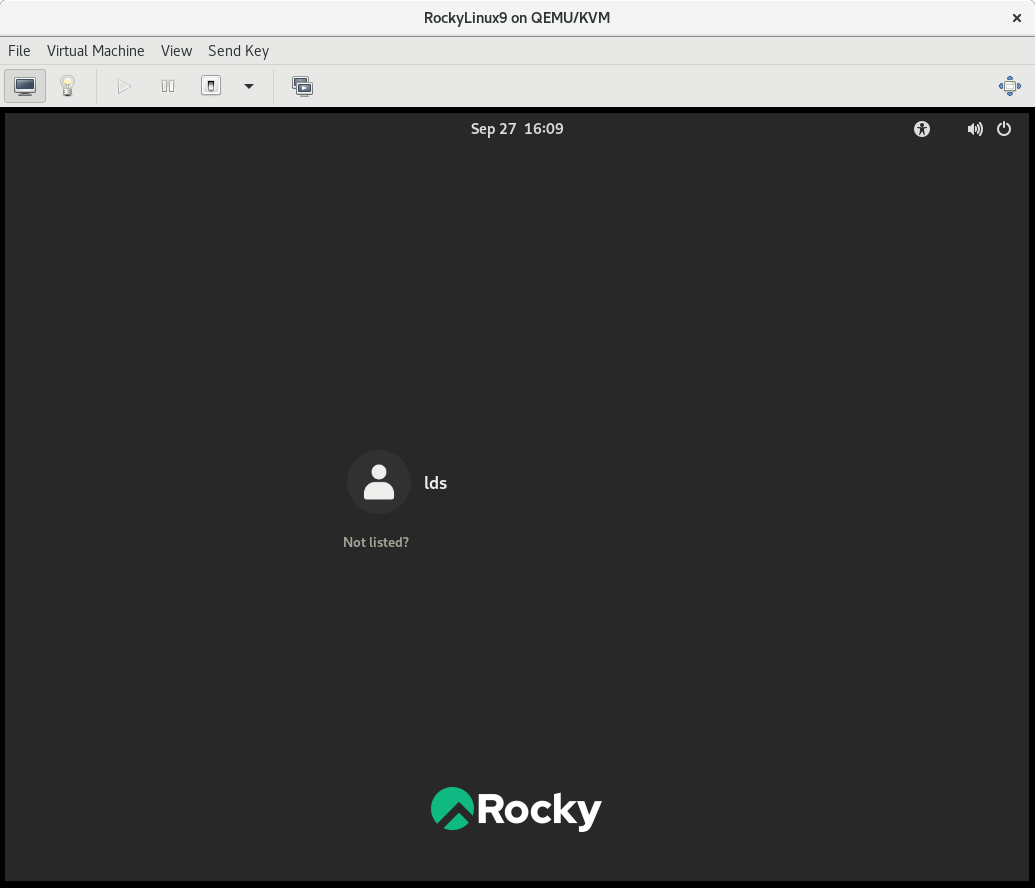
-
To log onto the system, type lds at the login prompt and press Enter.
-
At the Password prompt, type [INPUT] (lds’s password) and press Enter (the password will not be echoed to the screen, that is normal).


감사합니다.
- 이전글윈도우에서 리눅스를 실행하기 위한 WSL 따라하기 23.10.25
- 다음글Rocky Linux 9 - 설치 I 22.11.08
댓글목록

최고관리자님의 댓글
최고관리자 작성일좋은글 감사합니다. ^^